


Building an NMEA 2000 network for the first time can be confusing, especially when you need to connect multiple NMEA 2000 devices such as a chartplotter, GPS antenna, VHF radio, engine monitor, or marine sensors. Instead of selecting every NMEA 2000 cable, T-connector, power cable, and terminator separately, an NMEA 2000 starter kit provides the essential components needed to build a basic network from the ground up. However, not every kit is designed for the same installation: a simple Garmin NMEA 2000 starter kit setup may be sufficient for a small network, while a multi-device system may require additional T-connectors, backbone cables, and expansion options.
In this guide, we will explain what an NMEA 2000 starter kit includes, how the network works, how to install it correctly, and how to choose a kit based on the number of devices and future expansion requirements. We will also compare a complete NMEA 2000 starter kit with purchasing individual components separately and cover common installation mistakes to help you build a stable and properly terminated NMEA 2000 network.
What Is an NMEA 2000 Starter Kit?
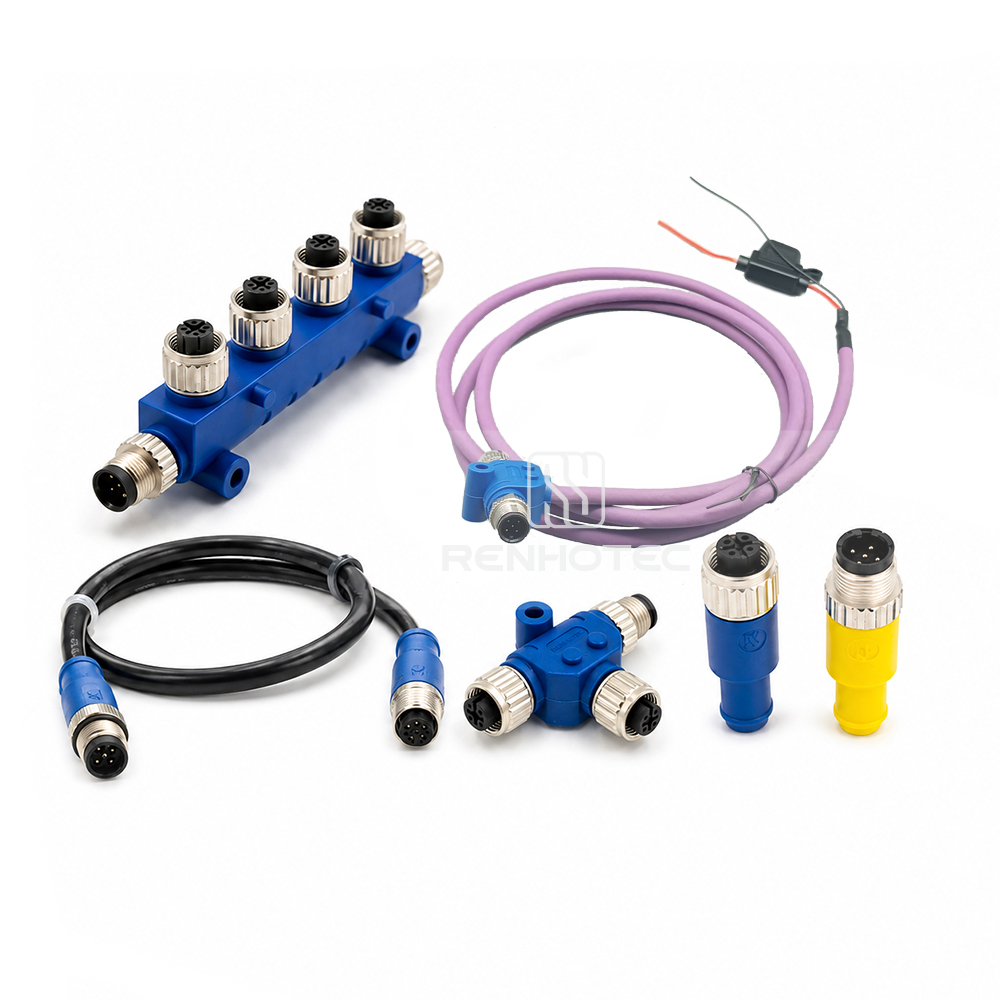
An NMEA 2000 starter kit is a pre-configured set of basic components used to establish an NMEA 2000 network and connect compatible marine electronics. Rather than purchasing each part individually, a kit typically combines the components needed to create the network backbone, supply power, connect devices, and terminate the network correctly. Depending on the manufacturer and network size, an NMEA 2000 starter kit may include a backbone cable, drop cable, T-connectors, power cable or Power-T, and two terminators. For example, Garmin’s starter kit includes a backbone cable, drop cable, power cable, two T-connectors, and male and female terminators, while other manufacturers may use different cable lengths or connector configurations. A starter kit therefore provides the basic building blocks for a new network, while additional NMEA 2000 devices, cables, and connectors can be added as the system grows.

What’s Included in an NMEA 2000 Starter Kit?
An NMEA 2000 starter kit typically combines the core components required to build a basic NMEA 2000 network, including backbone or drop cables, T-connectors, a power connection, and two 120 Ω terminators. The exact configuration depends on the number of devices you need to connect and whether the network will be expanded later. For example, Renhotec currently offers six starter-kit configurations, ranging from a Single Device Starter Kit for a basic setup to Dual Device, Compact 2-Way, 4-Way Backbone, Multi-Device, and Expandable 4-Way solutions.
| Starter Kit Type | Typical Network Size | Main Advantage | Recommended For |
|---|---|---|---|
| Single Device Starter Kit | 1 device | Simple and compact | First-time users |
| Dual Device Starter Kit | 2 devices | Easy connection of two devices | Small marine networks |
| Compact 2-Way Tee Kit | Up to 2 devices | Space-saving design | Compact installations |
| 4-Way Backbone Kit | Up to 4 devices | More connection points | Small to medium networks |
| Multi-Device Backbone Kit | 3+ devices | Expandable network structure | Multiple marine electronics |
| Expandable 4-Way Kit | 4+ devices | Easy future expansion | Networks that may grow |
The basic components in these kits work together to create the network backbone, provide power, connect NMEA 2000 devices, and maintain proper network termination. For instance, Renhotec’s 4-Way Backbone Starter Kit includes a 5 m drop cable, a power cable with a 5 A fuse, a 4-port T-connector, and male and female 120 Ω terminators. If you are building a new network, you can explore the complete range of Renhotec NMEA 2000 Starter Kits and select a configuration based on your current device count, available installation space, and future expansion requirements.
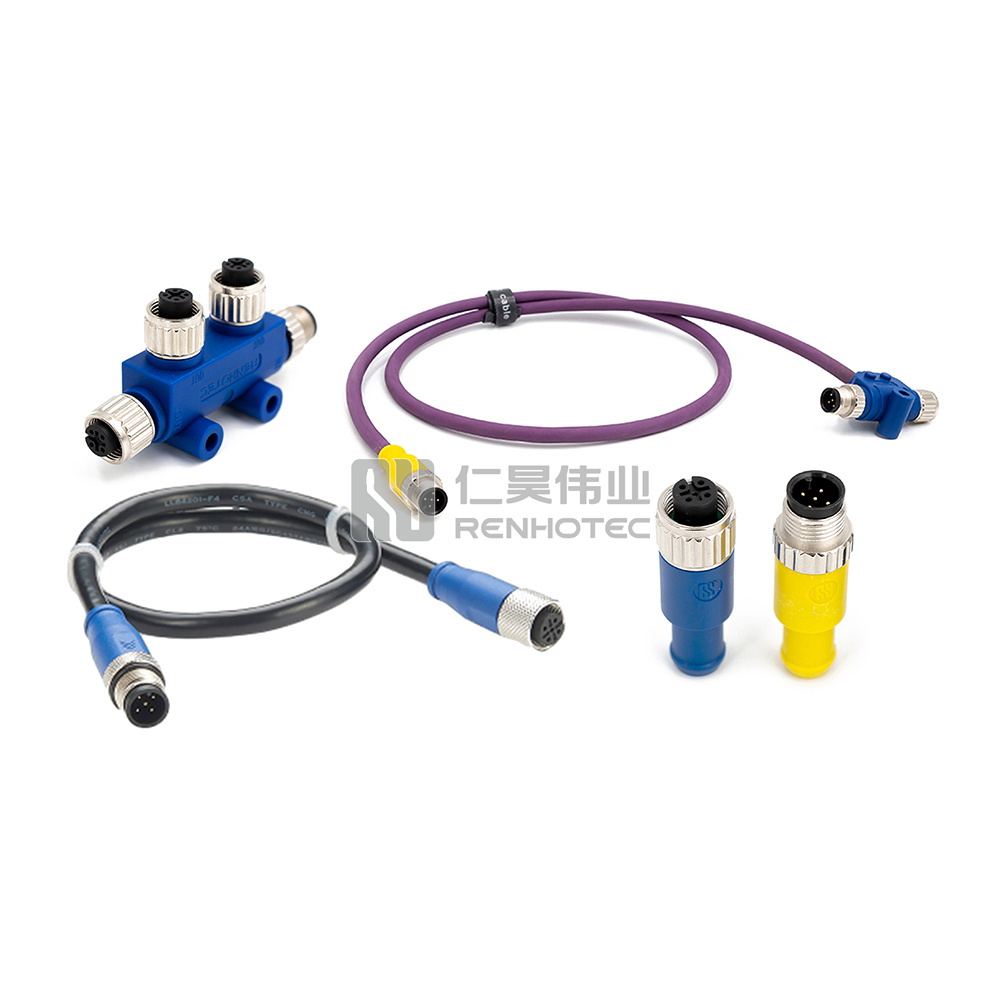
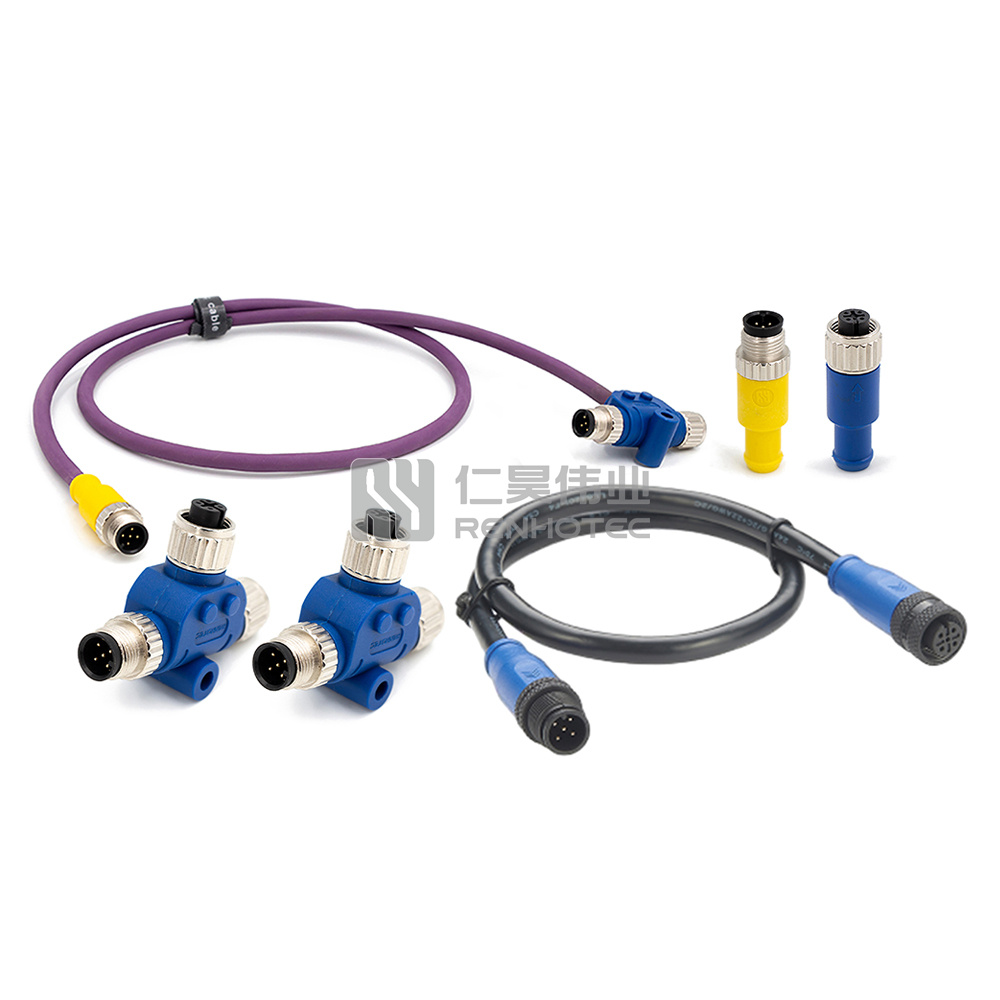
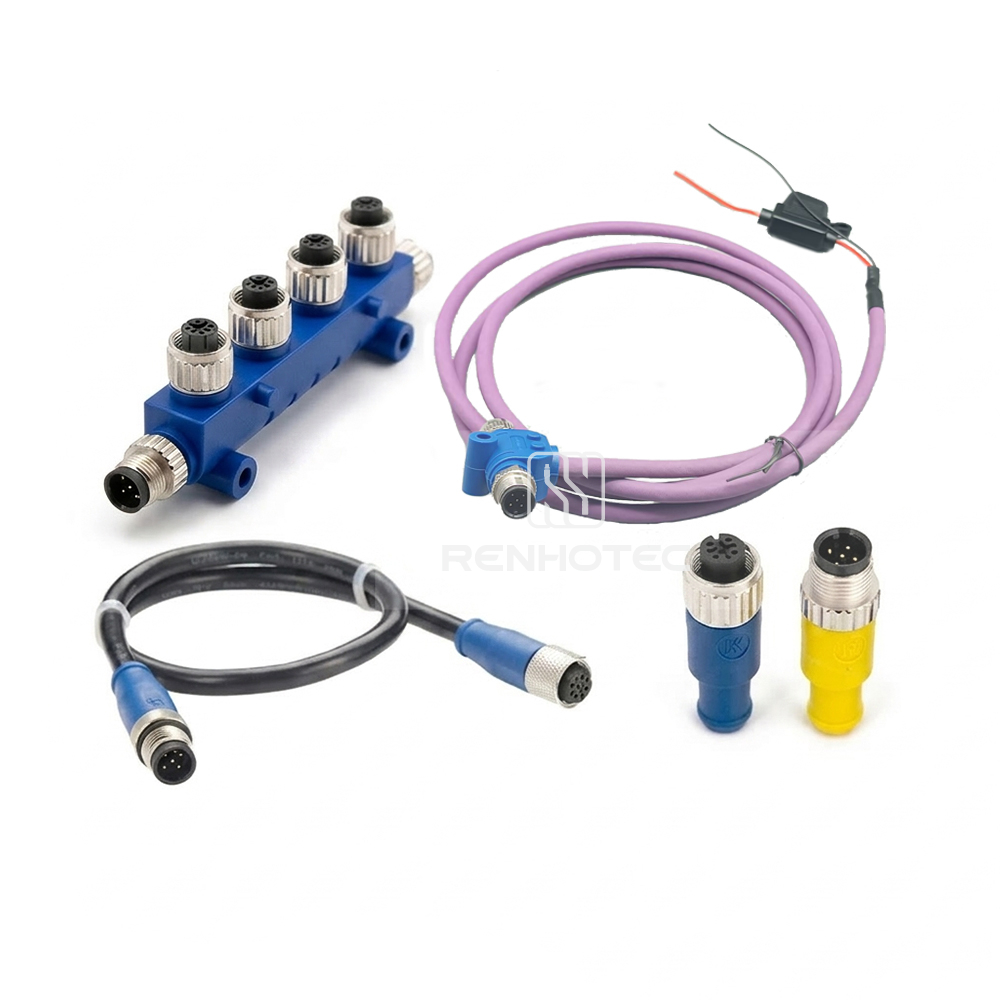
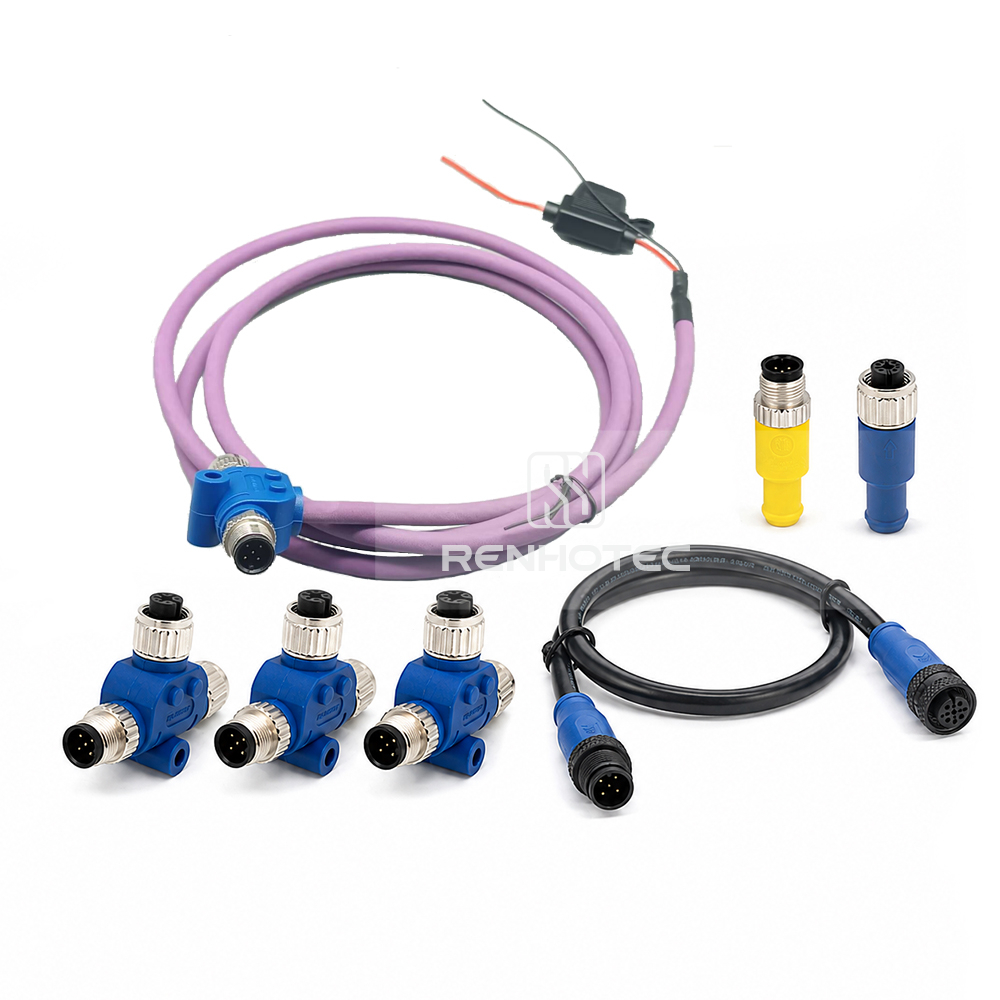
Kit
How Does an NMEA 2000 Starter Kit Work?
An NMEA 2000 starter kit provides the essential building blocks for creating a functioning NMEA 2000 network. Instead of connecting each marine electronic device directly to one another, the devices communicate through a shared backbone network. The starter kit typically combines the cables, T-connectors, power connection, and terminators needed to establish this network structure. Understanding how these components work together is important when selecting a kit, planning an installation, or expanding an existing system.
The Backbone Forms the Main Network
The backbone cable is the central communication path of an NMEA 2000 network. T-connectors are installed along the backbone to create connection points for individual devices. Depending on the starter kit configuration, the backbone may be made from one cable or multiple sections connected together.
The basic structure is:
Terminator → Backbone → T-Connector → T-Connector → Backbone → Terminator
The backbone should run through the main equipment area rather than being treated as a simple extension cable for one device. Additional backbone sections and connectors can be added when the network needs to serve more devices.
NMEA 2000 Devices Connect Through Drop Cables
Individual NMEA 2000 devices normally connect to the network through a T-connector and a drop cable. Typical devices include chartplotters, GPS receivers, VHF radios, autopilot systems, engine interfaces, and marine sensors.
A simplified connection looks like:
NMEA 2000 Device → Drop Cable → T-Connector → Backbone
This configuration allows multiple devices to share the same network while keeping the backbone as the main communication path. For larger installations, the number and placement of T-connectors and drop cables become important factors when selecting an NMEA 2000 starter kit.
The Network Also Requires Power and Proper Termination
An NMEA 2000 network needs a dedicated power connection so that the connected network components and compatible devices can operate. The power connection is typically integrated into the backbone through a power cable or Power-T, depending on the system configuration.
Two 120 Ω terminators are also required at the physical ends of the backbone. They are an essential part of the network design and should not be treated as optional accessories. Incorrect termination, missing terminators, or additional terminators in the wrong locations can cause communication problems.
Typical NMEA 2000 Starter Kit Configuration
| Component | Main Function |
|---|---|
| Backbone Cable | Creates the main network communication path |
| T-Connector | Provides connection points for devices |
| Drop Cable | Connects an NMEA 2000 device to the backbone |
| Power Cable / Power-T | Supplies power to the network |
| 120 Ω Terminators | Terminates both physical ends of the backbone |
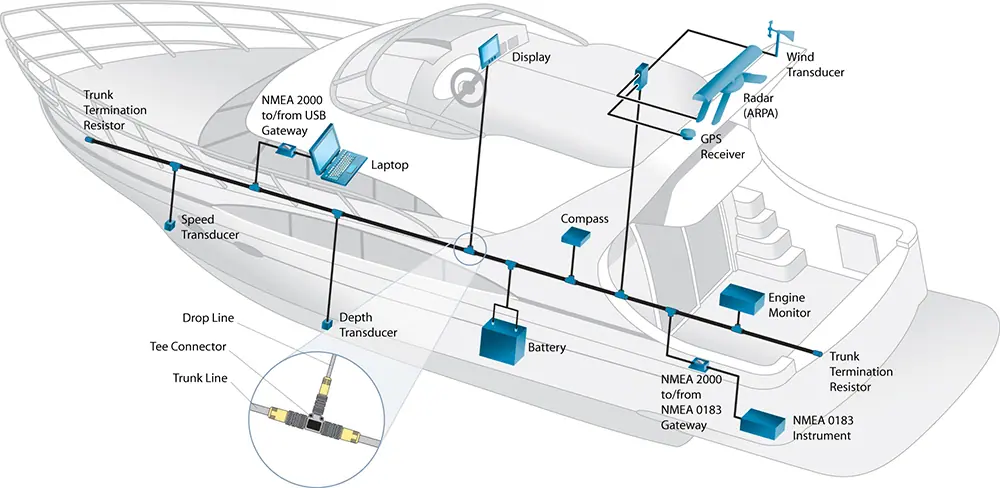
In practice, an NMEA 2000 starter kit simplifies this process by grouping the core components into a ready-to-install configuration. The right kit depends on the number of devices being connected, the available installation space, and whether the network may need to be expanded later. For users building a new system, Renhotec NMEA 2000 Starter Kits are available in different configurations for single-device, dual-device, 4-way, multi-device, and expandable network applications.
How to Install an NMEA 2000 Starter Kit
Installing an NMEA 2000 starter kit is relatively straightforward when the network is planned correctly. The most important principle is to build the backbone first, connect the required devices through T-connectors and drop cables, add network power, and ensure that the backbone is terminated at both physical ends. Before installation, determine the number and location of your NMEA 2000 devices, estimate the required backbone and drop-cable lengths, and leave enough space for future expansion. A properly planned layout not only makes installation easier but also reduces the risk of communication problems caused by incorrect cabling or termination.
Step 1: Plan the NMEA 2000 Network
Start by identifying all devices that need to join the network, such as:
- Chartplotters and multifunction displays
- GPS receivers
- VHF radios
- Autopilot systems
- Engine monitoring interfaces
- Marine sensors
Arrange the devices based on their physical locations and determine where the backbone should run. The backbone should form the main route through the installation area, while individual devices should connect to it through T-connectors and drop cables.
Step 2: Build the Backbone
Connect the required NMEA 2000 cable sections and T-connectors to create the backbone. The backbone should remain continuous between its two physical ends, while the side ports of the T-connectors are used to connect individual devices or other required network components.
A basic installation can be structured as:
Terminator → Backbone Cable → T-Connector → T-Connector → Backbone Cable → Terminator
For larger systems, additional T-connectors and backbone sections can be added to provide more connection points.
Step 3: Connect the NMEA 2000 Devices
Connect each device to a T-connector using the appropriate drop cable. Avoid treating a drop cable as a replacement for the backbone. The backbone provides the primary network path, while the drop cable provides the connection between the backbone and an individual device.
For example:
Chartplotter → Drop Cable → T-Connector → Backbone
The same basic principle applies to GPS receivers, VHF equipment, sensors, and other compatible NMEA 2000 devices.
Step 4: Connect Network Power
Connect the NMEA 2000 network to an appropriate power source using the power cable or Power-T included with the installation. The power connection should be planned as part of the network layout rather than added after all devices have been connected.
Pay attention to the required fuse protection, cable routing, polarity, and available power capacity. The exact power arrangement should follow the requirements of the equipment and NMEA 2000 installation guidelines.
Step 5: Install the Two Terminators
Install one 120 Ω terminator at each physical end of the backbone. Do not place terminators at individual devices or randomly along the network.
A simplified completed network looks like:
120 Ω Terminator → Backbone → T-Connectors → Backbone → 120 Ω Terminator
with the connected devices and power connection branching from the T-connectors.
Step 6: Check the Network Before Powering On
Before powering up the system, inspect every connection and verify that:
| Checkpoint | What to Verify |
|---|---|
| Backbone | Continuous and correctly connected |
| T-Connectors | Properly positioned and connected |
| Drop Cables | Correctly connected to devices |
| Power | Correct polarity, fuse and connection |
| Terminators | Exactly one at each backbone end |
| Devices | Compatible with the NMEA 2000 network |
How to Choose the Right NMEA 2000 Starter Kit
Choosing the right NMEA 2000 starter kit depends primarily on the number of devices you need to connect, the available installation space, and whether you expect the network to expand later. A small boat with a single chartplotter has very different requirements from a system integrating a chartplotter, GPS, VHF, autopilot, engine interface, and multiple sensors. Rather than choosing a kit based only on the number of connectors included, consider the complete network structure, required NMEA 2000 cable length, device locations, and future expansion needs.
1. Choose Based on the Number of NMEA 2000 Devices
The simplest starting point is to count the devices that will be connected to the network.
| Network Requirement | Suitable Starter Kit | Typical Application |
|---|---|---|
| 1 device | Single Device Starter Kit | Basic or first-time installation |
| 2 devices | Dual Device Starter Kit | Small marine electronics network |
| 1–2 devices in limited space | Compact 2-Way Tee Kit | Compact installation |
| Several devices | 4-Way Backbone Starter Kit | Small to medium network |
| Multiple devices | Multi-Device Starter Kit | More complex marine systems |
| Current and future devices | Expandable 4-Way Kit | Networks requiring future expansion |
For example, a single-device kit may be sufficient when connecting one chartplotter or marine sensor, while a dual-device NMEA 2000 starter kit is more appropriate when two devices need to share the same network. If several devices will be installed, a 4-way or multi-device configuration can provide more connection points without requiring immediate modification of the backbone.
2. Consider Future Network Expansion
The number of devices you have today may not be the same as the number you will have in the future. Many boat owners begin with a chartplotter and GPS, then later add a VHF radio, autopilot, engine interface, or additional sensors.
In this situation, an expandable NMEA 2000 starter kit can be a better long-term choice than selecting the smallest possible configuration. It allows additional T-connectors, drop cables, and backbone sections to be added as the system develops.
This is particularly useful for installations where replacing or redesigning the backbone later would be difficult.
3. Match the Kit to Your Installation Space
Installation space is another important factor. A larger kit with more connection points may provide greater flexibility, but a compact network may benefit from a smaller and more space-efficient configuration.
Before selecting a kit, consider:
- Where the backbone will be installed
- Distance between connected devices
- Available space around each T-connector
- Required backbone and drop-cable lengths
- Accessibility for future maintenance
For compact marine electronics installations, a Compact 2-Way Tee Starter Kit may be more practical than a larger multi-device configuration. For larger systems, a 4-way or expandable solution can simplify network organization.
4. Choose a Kit That Matches Your Network Growth Plan
A good starter kit should meet your current requirements without unnecessarily limiting future expansion. A practical way to select a kit is:
Current device count → Installation space → Cable requirements → Future expansion → Starter kit configuration
For users building a new network or replacing an existing setup, the Renhotec NMEA 2000 Starter Kit range provides different configurations for single-device, dual-device, compact, 4-way, multi-device, and expandable applications. This makes it easier to select a network starting point based on actual installation requirements rather than purchasing individual components without a clear network plan.
NMEA 2000 Starter Kit vs. Buying Components Separately
An NMEA 2000 starter kit is often the simplest option for building a new network, but it is not always necessary to purchase a complete kit. The better choice depends on whether you are creating a new NMEA 2000 network, expanding an existing one, or replacing individual components. A starter kit is generally more convenient because the core NMEA 2000 cable, T-connectors, power connection, and terminators are packaged together for a specific network configuration. Buying individual components, on the other hand, provides more flexibility when you already have part of the network installed or require specific cable lengths and connector arrangements.
Starter Kit: Best for New Network Installation
A starter kit is particularly suitable when building an NMEA 2000 network from the beginning.
Key advantages include:
- Simpler component selection: The essential components are grouped into one configuration.
- Faster installation: Fewer individual parts need to be selected and ordered.
- Easier network planning: The kit is designed around a specific number of connection points or devices.
- Lower risk of missing essential components: Important items such as terminators and power connections are included in the package.
For a first-time installation, an NMEA 2000 starter kit can therefore reduce the time required to plan the network and make it easier to establish the basic backbone correctly.
Individual Components: Best for Expansion or Replacement
Buying components separately makes more sense when you already have an NMEA 2000 network and only need to add or replace specific parts.
For example, you may only need:
- An additional NMEA 2000 cable to extend the backbone
- A T-connector for an additional device
- A drop cable with a specific length
- A replacement 120 Ω terminator
- A connector or adapter for a custom installation
In these situations, purchasing another complete starter kit may result in unnecessary components. Renhotec therefore also offers dedicated NMEA 2000 Cables, NMEA 2000 Connectors, and NMEA 2000 Terminator Resistors for network customization, expansion, and replacement.
Which Option Should You Choose?
| Situation | Recommended Option | Why |
|---|---|---|
| Building a new NMEA 2000 network | Starter Kit | Provides the essential components together |
| Connecting a small number of devices | Starter Kit | Simple and fast to install |
| Expanding an existing network | Individual Components | Buy only what is needed |
| Replacing a damaged component | Individual Components | Avoid purchasing an entire kit |
| Planning future expansion | Expandable Starter Kit | Provides a suitable starting structure |
| Custom cable length or configuration | Individual Components | Greater flexibility |
The key distinction is simple: use a starter kit to build the foundation of a new network, and use individual components to customize, repair, or expand an existing system. For users starting from scratch, selecting the appropriate Renhotec starter kit first can provide a clear network structure; individual cables, connectors, and terminators can then be added as the network grows.
Common NMEA 2000 Starter Kit Installation Mistakes
Even when the components in an NMEA 2000 starter kit are easy to connect, installation mistakes can still cause intermittent communication, missing devices, or a network that fails to operate correctly. Most problems are related to backbone layout, incorrect T-connector usage, missing or incorrectly positioned terminators, improper power connections, or unsuitable cable lengths. Reviewing these common mistakes before powering the system can help prevent unnecessary troubleshooting and ensure that the NMEA 2000 network is built correctly from the beginning.
Mistake 1: Using Drop Cables as the Backbone
A common mistake is treating a drop cable as a replacement for the backbone. The backbone should form the main continuous path of the network, while drop cables connect individual NMEA 2000 devices to T-connectors.
Correct:
Device → Drop Cable → T-Connector → Backbone
Using the wrong cable arrangement can make the network difficult to expand and may result in an incorrect network topology.
Mistake 2: Installing the Wrong Number of Terminators
An NMEA 2000 network normally requires two 120 Ω terminators, with one installed at each physical end of the backbone. Adding extra terminators or placing them in the middle of the network can affect network communication.
A simple rule is:
One Terminator + Backbone + One Terminator
Do not install a terminator at every device or every T-connector.
Mistake 3: Connecting the Backbone Incorrectly Through T-Connectors
T-connectors should be positioned so that the backbone continues through the appropriate ports, while devices and other connections branch from the device-facing port. Confusing these ports can result in an incorrectly structured network.
Before installation, check the connector orientation and confirm which ports are intended for the backbone and which are intended for device connections.
Mistake 4: Ignoring Cable Length
Both backbone and drop-cable lengths should be considered when planning an installation. Simply choosing the longest available NMEA 2000 cable is not always the best approach. Excessively long or poorly routed cables can make installation more difficult and may create unnecessary voltage-drop or network-planning concerns.
Measure the required distances before selecting the starter kit and individual cable lengths.
Mistake 5: Incorrect Power Connection
The network needs a suitable power connection and appropriate protection. Incorrect polarity, unsuitable fuse protection, poor connections, or an improperly planned power location can prevent the network from operating normally.
Power should therefore be treated as an integral part of the NMEA 2000 network design rather than as an afterthought.
Mistake 6: Choosing a Starter Kit That Is Too Small
Selecting the smallest possible kit may appear cost-effective, but it can become inconvenient when additional devices are added later. For example, a network that initially contains only a chartplotter and GPS may later include a VHF radio, autopilot, or engine interface.
If expansion is likely, consider an expandable or multi-device NMEA 2000 starter kit from the beginning.
Quick Installation Checklist
| Check | Recommended Practice |
|---|---|
| Backbone | Keep the main network path continuous |
| T-Connectors | Use them as designated connection points |
| Drop Cables | Connect individual devices to the backbone |
| Power | Use a suitable, protected power connection |
| Terminators | Install one 120 Ω terminator at each backbone end |
| Cable Length | Plan cable lengths before installation |
| Expansion | Leave suitable capacity for future devices |
Following these basic principles can help you avoid many of the most common NMEA 2000 installation problems. For a new installation, selecting a properly configured NMEA 2000 starter kit is often the easiest way to ensure that the essential components work together as part of a clear network design.
NMEA 2000 Starter Kit FAQs
Do I need four terminators if my boat has NMEA 2000 connections at both the helm and stern?
Not necessarily. If the helm and stern equipment are connected to the same NMEA 2000 backbone, the network normally requires only two 120 Ω terminators in total, with one at each physical end of the backbone. Protective caps on equipment such as distribution or interceptor units may look like NMEA 2000 terminators but can serve a completely different purpose. If the helm and stern contain two separate NMEA 2000 networks, each network must be evaluated and terminated independently.
Can I rotate or rearrange the T-connectors to fit a tight installation space?
The physical orientation of a T-connector is not, by itself, what determines whether an NMEA 2000 network will work. What matters is maintaining the correct backbone topology and placing the two terminators at the physical ends of the backbone. In a tight installation, use an appropriate multi-port connector or a suitable backbone arrangement rather than changing the intended network structure just to save space.
Can I use a 20-foot NMEA 2000 drop cable to connect an outboard engine?
A long drop cable may not be the best solution. The more practical approach is usually to extend the backbone closer to the engine and then use a shorter drop cable to connect the engine interface. This keeps the network structure easier to manage and can be preferable when the engine is located far from the main electronics area.
Should the NMEA 2000 backbone always be switched off when the boat is not in use?
Not necessarily. Some installations intentionally keep the NMEA 2000 network powered so that devices such as monitoring systems remain available, while others connect the network to a switched navigation-electronics circuit. The correct approach depends on the equipment and installation design. Always follow the manufacturer’s power requirements and provide appropriate fuse protection.
Can I add a Lowrance display or an engine to an existing NMEA 2000 network?
In many cases, yes. A new device will normally require an appropriate T-connector and drop cable, while an engine may also require a manufacturer-specific gateway or interface. Physical connector compatibility does not always guarantee that all engine data will be available on a display, so the device, gateway, supported PGNs, and manufacturer requirements should be checked before installation.
Can I mix NMEA 2000 cables and connectors from different brands?
Sometimes, but compatibility should be verified. Different manufacturers may use different connector families, cable assemblies, or device-specific interfaces. Before mixing components, check the connector type, pin configuration, cable function, and manufacturer’s compatibility requirements. For a new installation, using a consistent connector system can simplify installation and future maintenance.
How can I troubleshoot an NMEA 2000 network when GPS or other devices intermittently disconnect?
Start with the basics before replacing components. Check the network power supply and fuse, inspect all T-connectors and cable connections, verify that the backbone has the correct two terminators, and look for loose or damaged connections. With the network powered off, measuring resistance across the appropriate CAN-H and CAN-L conductors can also provide useful information about the backbone and termination. For persistent problems, check the complete network topology and consult the equipment manufacturer’s troubleshooting procedure.

As a Product Manager at Renhotec Group (est. 2008), I specialize in providing deep technical insights into connectors, cables, and custom electronic components. Renhotec is a global leader in interconnect solutions, dedicated to manufacturing high-standard products for diverse industries as your trusted technical partner.